
Stable Diffusion
Introduction
This tutorial aims to provide a straightforward explanation on how to utilize stable-diffusion in conjunction with stable-diffusion-webui to generate Furry pictures by utilizing a starter kit.
I will attempt to explain the concepts and tools in a simple way, without requiring an in-depth and scientific explanation.
This is an introduction to IA for people who don’t know much about IT.
If needed, I will write down multiple versions of the steps for each operating system and GPU.
brand (Nvidia and AMD).
There will be two versions: one short and one long. The longer one will try to explain what you need to know quickly. You can skip it if you want.
For Linux, everything is done for an Ubuntu based distro, if you have any other distribution you should only need to adapt the dependencies installation (driver and packages).
What you need
Hardware
To run stable-diffusion you need a powerful enough computer with a good GPU, you can run it on CPU, I will not cover it because it adds too many limitations.
- 20GB of space on your computer (a SDD would be better for some usage like refining)
- At least 8Go of ram and
- A GPU with 6Go of VRAM (recommend 8 or more)
- A Nvidia GPU running CUDA or ROCm compatible AMD GPU (Polaris architecture or Newer)
Any recent enough GPU should be capable of running it.
Windows
For Windows you can check your GPU in your settings, then System → Display → Related settings → Advanced display, you should find your GPU model, and you then can look online for this information.
The ram information can be found in your task manager (CTRL + Shift + ESC) in the performance tab.
Linux
You can find your GPU information using lspci | grep -e "AMD/ATI" -e "nvidia" and ram information with free -h in a terminal.
Stuff to download
You will need this list:
- The software running the IA Stable-diffusion web ui
- A model to use with stable-diffusion YiffyMix
- A lot of embeddings (Teach some concept to the model, optional, but I use them in my styles)
- A VAE Kl-f8-anime2 from source from source
- A upscaler for post work (optional) 4x-UltraMix from source
- styles.csv list of premade prompt piece (optional)
- A reference picture to test
AI Setup
Stable-diffusion WebUI
It’s now that you will need to know your GPU brand, if you have an Nvidia one, congratulation you got the easy path, if you have an AMD one don’t worry it will just be a few extra steps.
Nvidia
Windows
- Get the AI software here https://github.com/AUTOMATIC1111/stable-diffusion-webui/releases/tag/v1.0.0-pre
- Unzip the file to any directory that you want
- Double-click the update.bat to update web UI to the latest version
- Double-click the run.bat to launch web UI, The first time will take some time because it’s downloading a large amount of files.
- It should work now, you can visit the WebUI at http://127.0.0.1:7860 in any browser.
Linux
- Get python virtual environment library
sudo apt install git python3.10-venv -y - Get the last version of Stable-diffusion
git clone https://github.com/AUTOMATIC1111/stable-diffusion-webui && cd stable-diffusion-webui - Activate the virtual environment
python3.10 -m venv venv - Start the web UI
./webui.shThe first time will take some time because it’s downloading a large amount of files. - It should work now, you can visit the WebUI at http://127.0.0.1:7860 in any browser.
AMD
This way will have an extra step, you need to know that AMD GPU are not officially support for stable-diffusion as
it uses under the cover CUDA that is an Nvidia technology.
So we will need to replace the part that use CUDA to add one using ROCm.
Windows
As I use Linux and only never tried this to use AMD GPU on Linux, I can only hope that it will work, note this is using a fork of stable-diffusion using another lib the final result may vary.
- install Python and don’t forget to tick add to PATH 3.10.6
- Install git
- Open the cmd terminal
- copy this into it
git clone https://github.com/lshqqytiger/stable-diffusion-webui-directml && cd stable-diffusion-webui-directml && git submodule init && git submodule update - Double click
webui-user.batinto the software folder - The installer can be stuck, if it does press “enter” in the cmd (Probably waiting for user input)
- Be happy it should work now, you can visit the WebUI at http://127.0.0.1:7860 in any browser.
Linux
First, we will need to install specific AMD driver to enable IA support with ROCm
- install the dependencies
sudo apt update && sudo apt install -y git python3-pip python3-venv python3-dev libstdc++-12-dev - Get the latest driver here https://repo.radeon.com/amdgpu-install/5.7.2/ubuntu/jammy/amdgpu-install_5.7.50702-1_all.deb
- Install them
sudo dpkg -i <deb file> - Install them step 2
sudo amdgpu-install --usecase=graphics,rocm - Grant your user access to the GPU devices
sudo usermod -aG video $USER && sudo usermod -aG render $USER - Restart your computer
Then we can do the actual software installation
- Get the last version of Stable-diffusion
git clone https://github.com/AUTOMATIC1111/stable-diffusion-webui && cd stable-diffusion-webui - Set up the virtual environment
python3 -m venv venv && source venv/bin/activate - Install the dependencies
pip3 install -r requirements.txt - Remove the Nvidia based backend
pip3 uninstall torch torchvision - Install the AMD one
pip3 install torch torchvision torchaudio --index-url https://download.pytorch.org/whl/rocm5.6 - Get a launch script
curl https://gist.githubusercontent.com/evshiron/8cf4de34aa01e217ce178b8ed54a2c43/raw/a27b9575b0eb1f688042d4acf606ebfba96f5ace/launch.sh > launch.sh - Finally launch the WebUI
bash launch.shThe first time will take some time because it’s downloading a large amount of files. - It should work now, you can visit the WebUI at http://127.0.0.1:7860 in any browser.
Add the model and modules
- Move YiffyMix into
models -> stable-diffusion - Move the VAE into
models -> vae - Move all the embeddings into
embeddings - Move the upscaler into
models -> ESRGAN - Move styles.csv into the root folder next to ’launch.sh’ and ‘webui.py’
Config inside the software
- Restart Stable-diffusion WebUI
- Go to http://127.0.0.1:7860
- In the “Settings” Tab, go under the VAE section and choose “WD-KL-F8-Anime2.vae” then apply settings
- That all !
Generate a first image
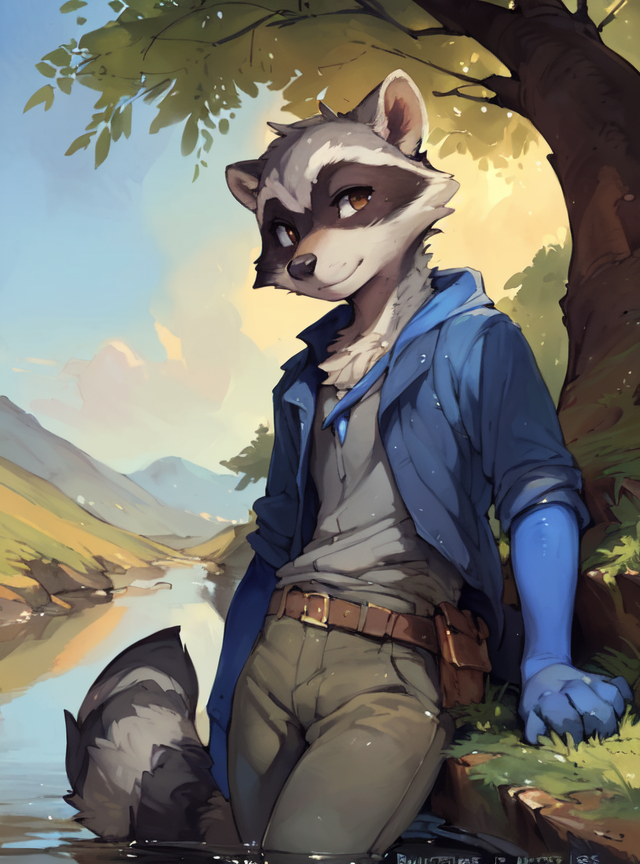
To do this, we will import a picture I already generated, copy the prompt and parameters so you can test your setup. It will also allow you to play a bit with a quick start.
- Go into “PNG info tab” and import the example picture, you should have text

- You can click on the “Send to txt2img” button

- You can now click on the generate button on the top right and wait for the image to appear, you should get the same
Simple process
This is a simple process to generate a new picture:
- Select the Sampling method : DPM++ 2M SDE Karras
- Samplings steps:
- 50 to test the prompt then 70 when you are happy with the result
- Width : 688
- Height : 864
- CFG Scale:
- 7 to start
- 9 later
- Maybe put a higher batch count to try multiple picture at each try
- Add some YiffmixBaseNew and yiffmixnegative and some graphic styles
- write your prompt and negative prompt, it’s easier to start with using e621 tag separate by comma
- When you have a good enough picture, send it to inpaint to correct error using the 🎨️ button
- Paint the area that you want to modify, generate new picture
- Send the picture to the “extra” tab using the 📐 button to upscale it.
Concept and how to make prompt
Stable Diffusion checkpoint
The model that you will use.
Prompt and negative prompt
The prompt is where you will explain what you want the picture to look like, in the context of YiffyMix you can use the tag on e621 by replacing the “_” by space. The negative prompt is a more tricky one, you will want to write down what you don’t want in the picture, but it’s not what want it to be, it’s a trick add by this Software that will generate a second picture and use it to explain what you don’t want to the AI, making a too descriptive negative prompt can end in bad result, keep as simple as possible
To avoid always writing down the same things in prompts and negative prompts you can use what is called a style, it’s like a prompt and negative prompt that will be added to the end of your current one, the styles.csv files you added is my personal one with some examples.
The syntax is pretty simple:
- You can make a concept more important using by putting in parentheses, then you can add value at the end to ingress how the effect (no value mean 1.1): (tag:1.2)
- You can do the same to make something less prevalent: (tag:0.8)
- Using [] allow the tag to appear later in the process, [tag:50] will make the AI start to use the tag at step 50
- [tag:50] Will do the opposite
- [tag:another:16] Will start by using “tag” then “another” after the step 16
For more info docs
A prompt example explained, but keep in mind this is just one way to do it:
Prompt:
# What you want
solo male standing outside in front of a montain,
# Character Description
(slim:1.2) male fox with detailed orange fur and brown hair and (black forearm:1.1), glasses, green eye, school cloths, shy, nerd,
# Generic tag
(detailed lighting), (photorealistic:1.2), [realistic proportions], [sharp focus], (hi res), (shaded), (masterpiece:1.2),
# Artstyle
uploaded on e621, ((by Fumiko, by Slugbox, by Drakgem, by Wildering, by Null-Ghost, by Silverfox5213)),
Negative prompt:
# generic tag and embeddings
unusual anatomy, mutilated, malformed, watermark, amputee, BadDream, bwu, boring_e621_v4
Creating this picture

Batch count and Batch size
How many picture the AI will generate each time and how many at a time (except if you have way enough resource doing multiple at once is rarely worth it).
CFG Scale
The CFG scales will control how much the AI will follow your direction, the higher the value the image will stick to the prompt, it’s better to give lower value at first, the value you will want to give also depend on the model that you are using.
In the context of YiffMix stay on value between 5 and 10.
Picture resolution
This is the parameter that will make your GPU die or not, so do go crazy on it or the software will crash or refuse to generate the picture because of the lack of VRAM.
You will want to stay on some “magic” value, typically the resolution of the picture used to train the model, so classic image ratio and the usual one used in AI (712, 512, 1024).
If you want some value, 688x864 is a good start.
Sampling steps and slampler
In short, the higher the value the better the picture will be to an extend, so you will want to use small value to first test your prompt and then ingress the value.
For a better explanation generative AI of the family of stable diffussion work in an iterative process, generating a first picture and refining it at each step, the slampler is the algorithm that will manage this process. For a longer explanation https://stable-diffusion-art.com/samplers/#What_is_Sampling
Seed
If you have ever played minecraft you probably already know what it is, it’s a number used to quick-of the random number generator used in by the AI to generate the picture. It means that if you use the same seed with the same prompt with the same parameter you should always get the same result. -1 is used to tell the software to get a new random one each time, you can use the recycle button to get the last seed used.
Hires. fix
Work like a img2img generator after the generation of you picture to ingress the resolution while adding detail using less VRAM than generating directly a higher resolution picture. A few parameters are here:
- The upscaler, simple
- Hires steps: how many steeps it will do it (higher usually mean higher quality, 10-15 is enough)
- Denoising strength, how much it will change the picture, I like to use 0.7
- Upscale by, how much it will increase the picture resolution, depend on your VRAM, it goes up very quickly so start small and go up after (1.1)
img2img tab
This tab offer similar functionality as the TXT2IMG, but you can give it a reference image to start with, I will only explain the two more useful one
img2img
This will generate a new image using a prompt and a picture as a reference, you should recognize most parameter, I recommend using the Resize By parameter to make it easy to keep the image ratio and make the picture a more manageable size.
Denoising strength is maybe also new, it will tell the AI how much different the new picture must be compared to the reference one.
Inpaint
This mode allow you to paint on a picture, the painted area will be modified but not the rest, it so can be used to correct something that you don’t like, it’s very useful on picture generated, using it on non AI need more work.
A nice easy win is to have your generated picture, using the same prompt + a negative prompt for what your don’t want (or positive one to add something).
Extra
The extra tab is mainly used to upscale a picture after generating it, its also work very well with non AI picture. The parameters:
- Resize
- Upscaler 1
You can ignore the rest for now it’s useful for edge or advanced case. You can go crazy in this tab, it’s use way less VRAM than generating new picture.